How to Install Express.js
- First, make a free Heroku account at https://signup.heroku.com/.
- Then, install the Heroku CLI onto your computer by following the instructions at https://devcenter.heroku.com/articles/heroku-cli/. Make sure to install Git (ensure to follow first time steps if you haven't installed Git before) before installing the Heroku CLI if you don't already have it. The link for the Git installation is available on the Heroku CLI installation website.
- After installing Heroku and Git, you must install Node.js which you can do at https://nodejs.org/en/download/.
-
Now that you have installed Node.js, create a directory to hold your
application, and make that your working directory.
$ mkdir myapp
$ cd myapp -
Use the npm init command to create a package.json file for your
application.
$ npm init
- This command prompts you for a number of things, such as the name and version of your application. For now, you can simply hit RETURN to accept the defaults.
-
Now install Express in the myapp directory and save it in the
dependencies list. For example:
$ npm install express --save
-
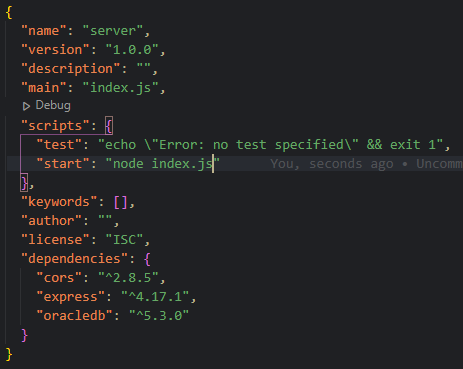
Insert the following script to the script section of the
package.json file:
"start": "node index.js"
Your package.json file should now look like this:
- Afterwards we write the code for your express server in the index.js file and save. More on how to write an express server will be located on the "Tutorial" page.
-
Enter in the following commands:
$ git init && git add . && git commit -m "init"
$ heroku create
$ git push heroku master